
Friday, January 4, 2013
Threshing wheat with our back to the land store thresher!
We are very thankful and blessed for this video made by our friends. This machine can empower a family to thrash about a pound and a half of wheat per minute. To clean this material whether it is wheat or any small grain, you can pour the seed and chaff into another bucket with the wind blowing and most of the chaff will blow away as the seed falls down into the bucket below.
Here at the Back to the Land Store, we sell Scythes for hand cutting small grains and most of the horse or tractor drawn equipment to prepare, plant, and plow the fields.
"If we ain't got it, we will find it for you"
We hope to hear from you soon and pray the Lord will richly bless you!
Thank you Jesse Bolton

Friday, December 21, 2012
Irish Whiskey Cake recipe! Try it
IRISH WHISKEY CAKE
Fine Cooking magazine gets the credit
for this one. Featured in the December
2012 issue

Cake
2 ½ cups unbleached all-purpose flour
2 cups granulated sugar
¾ cup unsweetened natural cocoa powder
1 ½ tsp. baking powder
1 ½ tsp baking soda
1 tsp. sea salt
2 large eggs (room temperature)
1 cup whole milk (room temperature)
½ cup cooking oil
1 ½ tsp. vanilla extract
1 cup hot coffee
Preheat the oven to 350 degrees. Butter or spray three 9” round cake pans and
line the bottoms with parchment. Spray
or butter the parchment. (I use Bak-Klene
spray for cake pans)
Briefly blend the flour, sugar, cocoa, baking powder, baking
soda, and salt on low speed in your stand mixer.. Add the eggs, milk, oil, and vanilla and mix
at low speed, scraping the bowl as necessary, until the mixture is thick and
creamy about 5 minutes. With the mixer
running, gradually add the coffee and blend just until combined. The batter will be quite thin. Divide the batter equally among the
pans. Bake 20 to 25 minutes until the
center is firm and springs back when touched.
Cool completely in the pans on racks.
Coffee-Whiskey Whipped Cream
1 Tbs. instant espresso granules
¼ cup Irish whiskey, such as Jameson
3 cups heavy cream
3 Tbs. packed dark brown sugar
Clean and chill the mixing bowl and whisk attachment. In a measuring cup, stir the instant espresso
into the whiskey until completely dissolved.
In the chilled bowl, whip the cream on medium-high speed while slowly
adding brown sugar until medium peaks form, 2-3 minutes. Add the whiskey mixture and continue to whip
just until combined.
Finish
Level the layers if needed.
Spread equal amounts of cream over each layer. Make large white and dark chocolate curls for
decorating the top by heating bars of chocolate in the microwave just until
they can be shaved into curls. Arrange
on top. I put the white ones in the
middle and surrounded them with the dark ones.
CAUTION
This cake does not hold well. It is best served immediately. Two hours in the refrigerator max.
Monday, December 17, 2012
How to Temper Chocolate!!
TEMPERING CHOCOLATE.

Choose
a sunny, dry day to accept this challenge.
Humidity will affect the final product.
Also, don’t try this in a very warm kitchen or in a direct draft.
The more chocolate you melt, the
easier the process. However, most of us
can’t handle five pounds of melted chocolate, so if you must reduce the amount,
also reduce the size of you utensils. My
double boiler is very large, so I purchased a small metal bowl which measures
about 6 1/2” across including a ½” lip.
I can now use a small saucepan of the same size. Remember that the pan must be deep enough to
prevent the bowl from touching the water.

Start with about 3 cups of chopped
chocolate. I like Trader Joe’s Dark
Chocolate for dipping. If Joe is not
close to you (I make a round-trip of about 120 miles to get mine, so I don’t
want to hear any whining). If you prefer
to order the good stuff online, go for Callabaut. I also found this at a restaurant supply
store in an 11 lb. block. Hold out about
1/3 of the chopped chocolate and heat the remainder in the bowl over steam
until all lumps have vanished. Check the
temperature. Your goal is 108F degrees
for dark chocolate, 106F for milk and 104F for white. Remove the bowl to the counter top. If you place it on a folded towel, you reduce
the possibility of allowing water to drop into your chocolate and the bowl slipping
onto the floor. Either scenario will
cause you to give up your career as a chocolatier before it ever begins. Water and other cold liquids are the enemy of
warm chocolate. I don’t need to tell you
about the floor – the thirty second rule won’t help you here.

Now we are ready to “seed” the chocolate. That is you will slowly add the remaining 1/3
about ¼ cup at a time until all is melted.
Stir vigorously all the time until your mixture reaches 90/88/86F
degrees respectively. Stirring is very
important to the proper crystal formation and bringing the temperature down. Be
careful not to incorporate air bubbles. When your temperature is correct, check your
chocolate by dipping some out and allowing it to set for a few minutes. When it
is still very shiny, keep stirring.
Perfectly tempered chocolate will be slightly shiny and have a decided
snap when broken. If yours does not,
don’t give up. Keep practicing.
If you just can’t handle
disappointment, don’t temper. Using a double boiler, slowly add 1/3 cup
tasteless vegetable oil to 3 cups of chopped chocolate while constantly
stirring over medium heat until completely melted Allow to cool until it is
dipping consistency. You can reheat as
needed.
Now, dip those truffles using a candy
dipping fork and place them on parchment paper to cool and solidify. YOU DID IT, YOU REALLY DID IT!

Write to us and tell us of your
success! If it didn’t work for you, be
very, very quiet…………not really, let us know what happened and maybe we can
diagnose the problem.
I wish you sweet success.
Wednesday, December 12, 2012
Day 2 of Christmas Candy! TRUFFLES
Now for the
challenge round:

CHOCOLATE TRUFFLES
Truffles are usually found in
specialty candy stores. They are often round
and either covered with chocolate or unsweetened cocoa. The center is a very rich, to-die-for ganache
which may or may not be flavored. Even
though they look intimidating and may cost as much as $2.50/pc, truffles are
not difficult to make. Making ganache is
a very simple process, and if you choose to cover with cocoa powder instead of
dipping, you are home free. You can put
them in those fancy paper cups in a fancy box, tie it with a bow, and the world
will beat a path to your door. I like
the chocolate dipped version a little better, however, so here goes –
I have chosen
to use dark chocolate for a very important reason. I like it!
Now that that is out of the way, I will also tell you that my very
favorite flavor is a raspberry and balsamic vinegar combination. I don’t want to hear a single yuck until you
have tried it. I can promise you that it
does not even resemble salad dressing.
The marriage of opposites is ever so pleasing. If you don’t like it, I will give you back
double what you paid for the recipe.
INGREDIENTS
1 cup heavy
cream
2 Tablespoons
corn syrup
¼ Teaspoon sea
salt
16 oz good
quality dark chocolate (Guirardelli bar or chips will work well)

2 Teaspoons
raspberry extract
1 Tablespoon
balsamic glaze (I found this at Trader Joe’s.
Balsamic vinegar will do, but the glaze is thicker and less likely to
soften the candy too much)
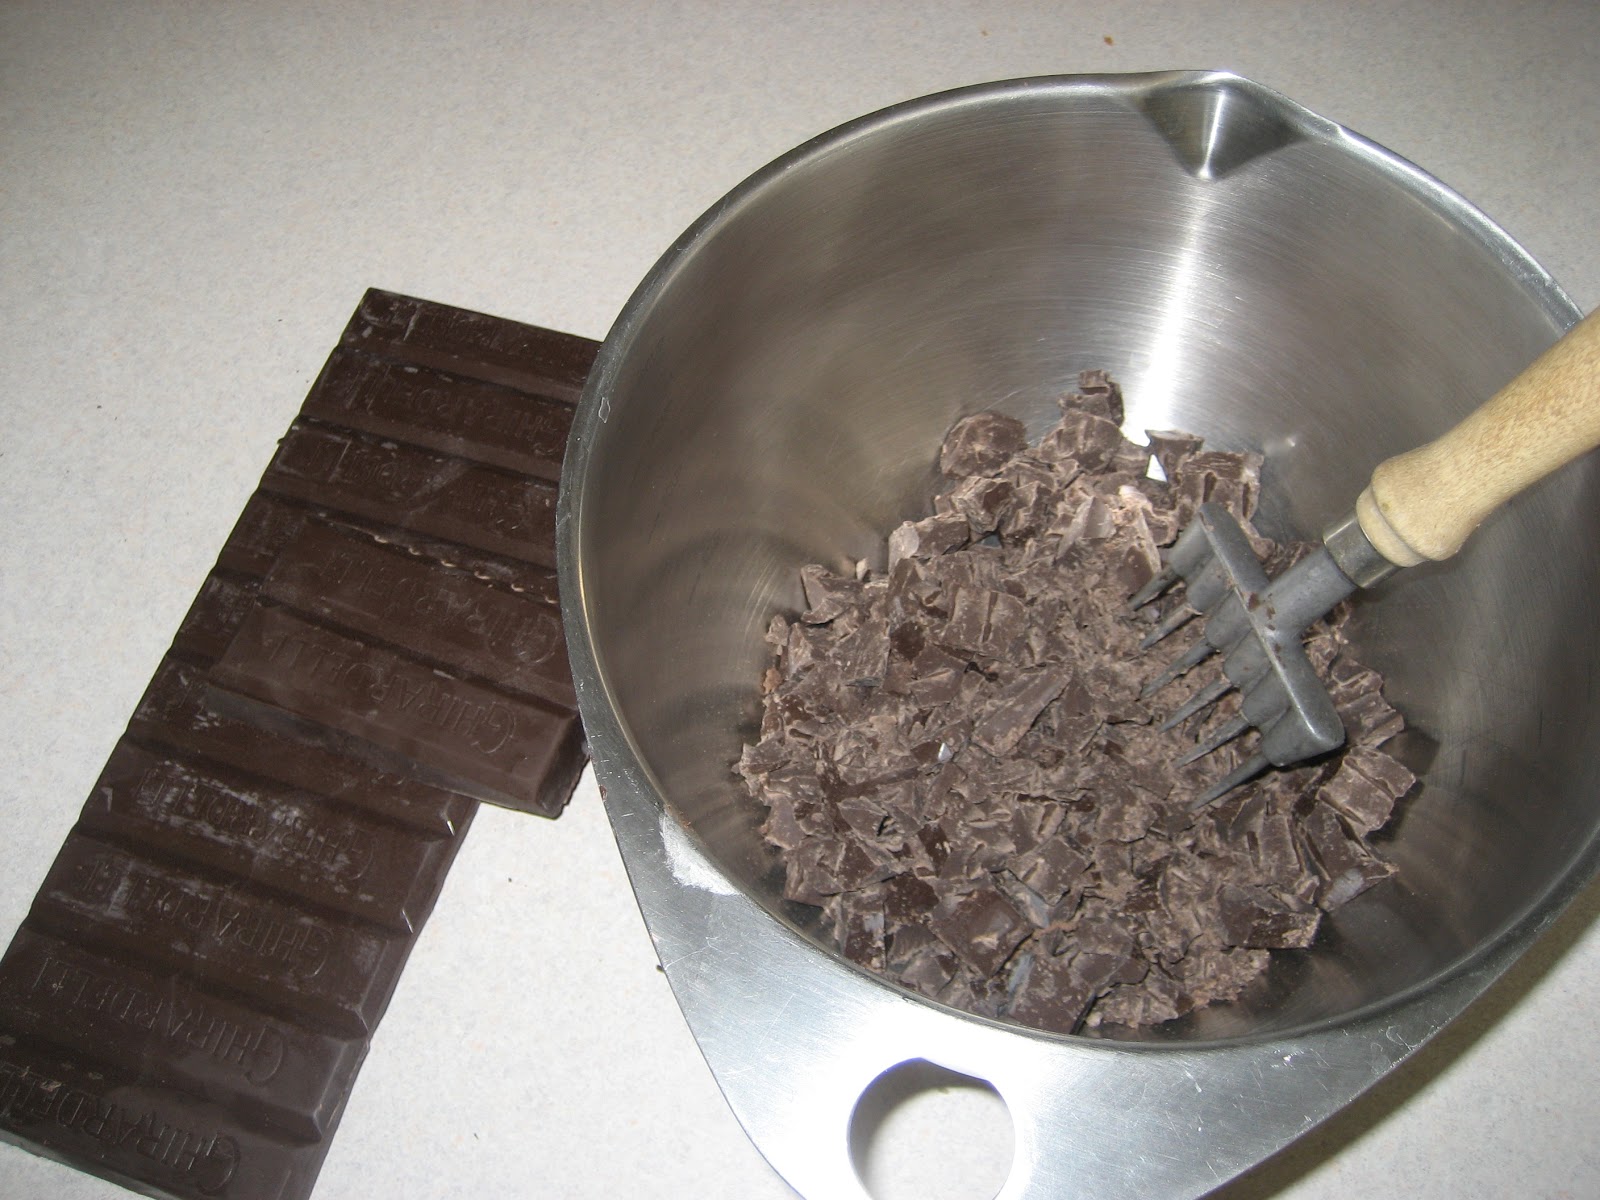
If you are not
using the Guirardelli large chocolate chips, chop the bar into bits about the
size of dice. Stir together the cream,
syrup and salt and bring just to boiling over medium heat. Pour over chocolate in medium bowl and allow
to stand five minutes. Stir from the
center until the mixture comes together into a smooth glossy mixture. This will take 8-10 minutes. Add the flavorings. Refrigerate at least 2 hours, preferably
overnight.
When set,
scrape along top with a spoon and roll into 1 inch balls. Place on parchment lined cookie sheet and
return to refrigerator for 20 minutes.

At this point,
you may elect to roll your trophies in cocoa or jump into the deep water. Come back tomorrow for TEMPERING CHOCOLATE.
Monday, December 10, 2012
EASY peppermint bark, make your own Christmas candy!!
Christmas Candy-Easy peppermint bark

This year I have jumped into the deep
water of candy making. I spent almost my
entire goodie budget on chocolate – good chocolate –very
good chocolate! The confection is o good ($$$) in fact that I wrapped every
gift and baked every cookie in order to avoid what could be failure. Good chocolate, you see, must be tempered, a
process that takes some practice when it is to be used as a dipping chocolate.
Failure would mean that my candy could look dull or streaked or worse, the
product of an amateur. Finally I put on my big girl pants and did it! I made photographs as I went along so I could
share my experience with you. Of course,
if it had gone badly, I would not have had to tell you, would I?
If you know me, you know that I never
approach a new skill by trying the simplest project. I usually start at the top and work down. Thirty
years of experience wants me to advise you not to do as I do.
If you wish to start your adventure into
Candyland with a simple project, I suggest you begin with the trendy peppermint
bark which can be accomplished by simply melting white chocolate, spreading it
on a parchment paper lined baking sheet, allowing it to cool slightly and sprinkling
the top with crushed peppermint. When it
completely cools, break it into random shapes.
TIPS
for Peppermint Bark:
·
Use quality
chocolate, either white, milk, or dark.
The amount does not matter as long as you have enough peppermint to
cover it.
·
Use a double
boiler to melt chocolate. Some recipes
suggest using the microwave, but I advise against it. First, I think microwaved food is of the
devil, and secondly it is VERY easy to burn chocolate. If you took my advice and used the good
stuff, you surely would not want to waste it.
You can create a double boiler by using a glass or metal bowl that fits
a pot that you already own. Be sure that
the steam does not escape around the sides as a steam burn will ruin your
day.
·
Place the
upper container which contains the chocolate over the pot which has about 1
inch of water in the bottom. Heat it
without allowing the water to touch the bottom of your upper container – steam
only. Stir gently until the chocolate is completely melted.
·
Buy the large
candy canes to crush. Some type of
Dollar Store is the best place to look. Put them in a gallon-sized freezer bag on a
hard surface and beat them(good time for venting) with the smooth side of a meat
tenderizer. Well, actually you can crush
them too much. You don’t want candy
sand, but neither do you want huge chunks of peppermint.
TUNE IN
TOMORROW FOR THE REST OF THE STORY, amazing chocolate truffles!!
Wednesday, November 28, 2012
Roasted Root Vegetable recipe!
November 28, 2012
Today my new best friends are root vegetables. Our winter garden consists of turnips, with
greens, of course, collards, kale, mustard, rutabagas, Swiss chard and “spring”
onions. They really aren’t spring
onions, but they look and act just like them.
Actually, they are multiplying onions.
Our friends introduced us to them last year, and they make me
happy. If you have a friend who has them
in his garden, he will be more than glad to share, as they are like zucchini,
you hate to throw them on the compost heap, but you can’t use them all. They are planted in mid-summer and harvested
all winter. In the spring, you pull them
up and hold them in a cool, dark place until time for planting time. Separate into single cloves before replanting.
It is such a pleasure to simply go to
the garden and pull up whatever I need when my recipe calls for green
onions. They will wait there patiently
until I need them all winter, unlike the ones I purchase in the grocery store. Of course, I am speaking for Middle
Tennessee, so you will want to research your zone.
Now, the rest of the story – during the summer we harvested
potatoes, carrots and butternut squash. (If
you don’t already have a root cellar for storage of these types of vegetables, get busy!) Yesterday I selected some of my stored vegs and combined them with
produce from the winter garden to make a delightful medley of roasted root
vegetables.
Here’s what I did.
I peeled and diced the following vegetables:
1 Butternut squash (peel and remove the seeds)
3 Potatoes
4 Carrots
2 Sweet Potatoes
3 Medium turnips
1 Rutabegga (a large yellow turnip)
10 garlic cloves
onions

I cut them into 1” cubes, but I have had them cut in 1”x 3”
strips like for fries, and I like that better.
Drench them in Italian dressing or olive oil. Sprinkle liberally with salt and pepper and
other herbs as desired. I used Rosemary
from my herb garden. Fresh herbs are
much better since this dish cooks so long.
Roast all except the garlic in an uncovered flat pan (large
Pyrex casserole). For 30 minutes at 400 degrees, stirring occasionally. Add the garlic cloves and continue to roast
another 30 minutes or until all vegetables are soft, especially the garlic.
You can prepare this well in advance and reheat at 450 until
warm.
NOTE:
Our cellar is under construction. I will blog about that with photographs
soon. Root cellaring is also possible
for you even if you live in an apartment.
Check out "Root Cellaring" by Mike and Nancy Bubel by clicking the colored text.

~ Pam Smith ~
Thursday, October 18, 2012
Fall greens, a southern favorite
Collards, kale, mustard, rutabagas, and turnips are just a few plant species found in the Brassica family that do particularly well in the fall season. They can tolerate frost, and they provide remarkable nutrition. Kale in particular houses a variety of nutritional benefits. Kale is low in Saturated Fat, and very low in Cholesterol. It is also a good source of Dietary Fiber, Protein, Thiamin, Riboflavin, Folate, Iron, Magnesium and Phosphorus, and a very good source of Vitamin A, Vitamin C, Vitamin K, Vitamin B6, Calcium, Potassium, Copper and Manganese. Whether eaten raw, or cooked down southern style these varieties of greens can be seen packing in quite a bit of flavor and much needed nutrition into your diet. Even Collards cooked down and salted only contains around 49 calories per cup and 308% of your daily vitamin A, 38% of your vitamin C and It is also a good source of Protein, Vitamin E (Alpha Tocopherol), Thiamin, Niacin, Magnesium, Phosphorus and Potassium, and a very good source of Dietary Fiber,Vitamin K, Riboflavin, Vitamin B6, Folate, Calcium, Iron and Manganese. If you would like more information on the nutritional data given in this post or on other foods please visit nutrition data.
Along with various health benefits Fall greens have made their way into tradition and onto the Sunday dinner tables of a majority of homes here in the South. I think we can all agree some of our best memories of family gatherings include a heaping of greens and some pepper sauce to top it off. Though greens aren't always a favorite choice of the younger crowd, they can serve as an important part of one's diet. I once had a two year old apply a coat of of chewed english peas and carrots to my face. He looked at me in a way that exclaimed, " I will bet you $10,000 that you can't make me eat 'em", I surrender. There are truly some children whom you cannot make green eaters of for sure! However, the Florida broad-leaf mustard is an heirloom variety that doesn't have the bitterness of turnips that we have come to expect and enjoy. With their mild and sweet flavor our youngsters enjoy them, which is why we encourage families to try new varieties of the foods they love. Heirloom varieties have much to offer and are well worth a try. If you would like more information about our Seed Savers seeds or other heirloom seeds please feel free to check out our website or give us a call!Back to the Land Seeds, and also for a great resource for learning about when you should plant check out Seed Savers Exchange.

Thank you for reading,
BTTLS family
Along with various health benefits Fall greens have made their way into tradition and onto the Sunday dinner tables of a majority of homes here in the South. I think we can all agree some of our best memories of family gatherings include a heaping of greens and some pepper sauce to top it off. Though greens aren't always a favorite choice of the younger crowd, they can serve as an important part of one's diet. I once had a two year old apply a coat of of chewed english peas and carrots to my face. He looked at me in a way that exclaimed, " I will bet you $10,000 that you can't make me eat 'em", I surrender. There are truly some children whom you cannot make green eaters of for sure! However, the Florida broad-leaf mustard is an heirloom variety that doesn't have the bitterness of turnips that we have come to expect and enjoy. With their mild and sweet flavor our youngsters enjoy them, which is why we encourage families to try new varieties of the foods they love. Heirloom varieties have much to offer and are well worth a try. If you would like more information about our Seed Savers seeds or other heirloom seeds please feel free to check out our website or give us a call!Back to the Land Seeds, and also for a great resource for learning about when you should plant check out Seed Savers Exchange.

Thank you for reading,
BTTLS family
Subscribe to:
Posts (Atom)